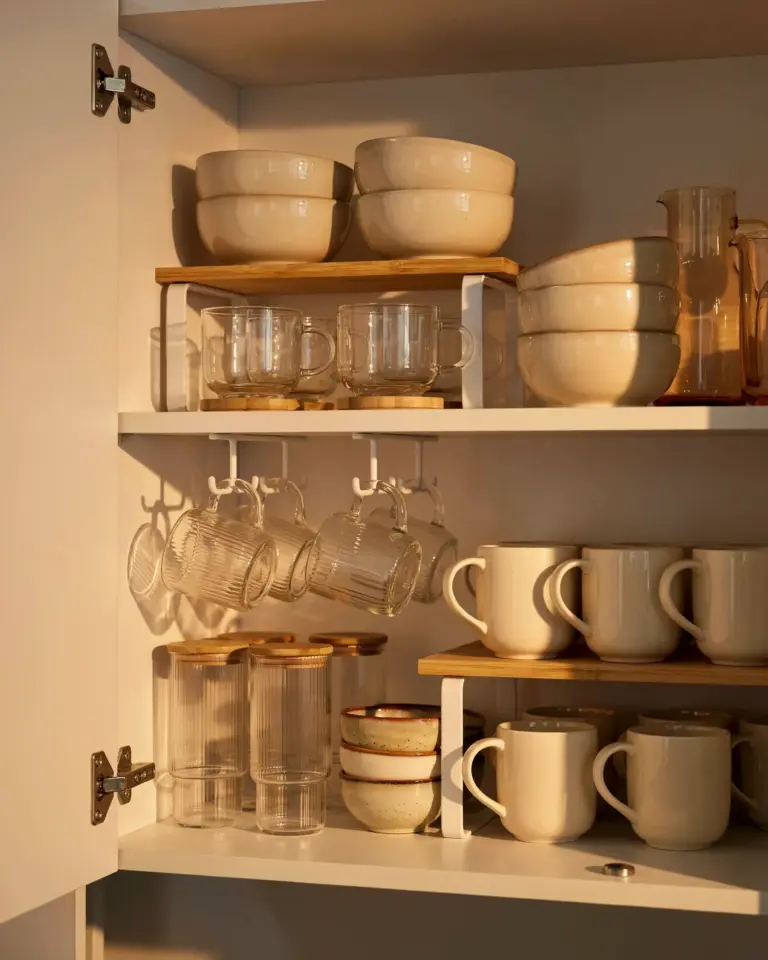
I finally tackled my cluttered cupboard shelves and the kitchen organization payoff is incredibly satisfying. You know that one cabinet where everything gets shoved in and you can never find the lid for the container? That was mine for months. After a Sunday afternoon of sorting, measuring, and rearranging, my small kitchen now has a home for every snack, spice, and storage container. The before and after difference is enough to make anyone want to grab a trash bag and start fresh. If your tiny kitchen feels chaotic, these concrete steps will help you create a cupboard makeover that actually sticks.
Assess Your Cupboard Space Before You Buy Anything
Do not run to the store for bins and baskets yet. Start by emptying every single shelf and laying everything on your counter or table. This step is uncomfortable but necessary. You will see exactly what you own and what is hiding in the back.
Measure your cupboard height, depth, and width with a tape measure. Note any odd corners or protruding hinges. Jot down the distance between shelves because many adjustable shelves can be moved. This assessment will save you from buying containers that do not fit or stack awkwardly. Trust me, I bought a set of tall canisters once that were one inch too tall for my upper cabinet. Learn from my mistake.
Declutter Like a Pro: What to Keep, Toss, or Donate
Here is the part that makes the biggest impact. Go through every item and decide its fate. Be honest about what you actually use. That dusty rice cooker you used once three years ago? Donate it. The set of mismatched plastic lids with no bottoms? Recycle them.
- Keep: Items you have used in the last three months, duplicates of essentials you reach for weekly, and sentimental pieces you genuinely love.
- Toss: Expired spices, stale crackers, broken gadgets, and chipped mugs. Throw away anything that could contaminate food or frustrate you.
- Donate: Working appliances, nice glassware, and unopened nonperishable food. Your local shelter will thank you.
After decluttering, you will likely have freed up 30 to 40 percent of your shelf space. That is not an exaggeration. The remaining items are the ones that deserve a designated spot.
Choose the Right Storage Containers for Dry Goods
Clear, airtight containers are your best friend for small kitchen storage. They keep pasta, flour, sugar, and cereal fresh and visible. I prefer rectangular containers over round ones because they line up neatly and waste no space. Square or rectangular shapes let you stack and fit more on a shelf.
Buy a set with uniform lids so you never hunt for the right cover. Glass containers are durable and do not stain, but plastic is lighter and cheaper. Either works as long as the lids seal tightly. For snacks like granola bars and crackers, use shallow bins rather than containers so you can grab one without opening a jar.
Use Baskets and Bins to Group Similar Items
Baskets are the secret weapon for cupboard organization. They corral small packets, tea bags, sauce packets, and medicine bottles that would otherwise slide around. Pick baskets that are wide enough to pull out easily but shallow enough to see the contents at a glance.
I use three small baskets in my snack cupboard: one for chips and crackers, one for granola bars and dried fruit, and one for tea and instant coffee. That way my family knows exactly where to find things and where to put them back. For lower cabinets, use handled bins so you can pull them forward without kneeling. Woven baskets look nice but plastic or wire bins are easier to wipe clean.
Maximize Vertical Space with Shelf Risers and Lazy Susans
Tiny kitchens need to think up, not out. Shelf risers create a second layer inside your cupboard. Use them for canned goods, spice jars, or small plates. Suddenly you double your usable space on one shelf. Just make sure the riser is stable and the items on top do not block the ones below.
Lazy Susans are a game changer for corner cabinets or deep shelves. Put your oils, vinegars, and condiments on a turntable and spin to reach the bottle in the back. For spice cabinets, a tiered spice rack that angles the labels toward you saves digging. I also stack my mixing bowls inside each other and nest my measuring cups. Vertical space is free real estate in a small kitchen. Use it.
Label Everything for Long-Term Success
Labels make good intentions permanent. Once you have everything in containers and baskets, grab a label maker or some chalkboard stickers. Write the contents clearly so no one has to open five bins to find the almonds. I label the fronts of bins and the tops of canisters. This is especially helpful if multiple people use the kitchen.
Do not overthink it. Simple words like Flours, Snacks, Baking, or Spices are enough. If you share a cupboard with a roommate or partner, labels prevent the dreaded question: Where does this go? They also help you notice when something is running low so you can restock before you run out.
Maintain Your Organized Cupboard with Simple Habits
The most satisfying before and after photo in the world means nothing if the chaos returns in two weeks. Build one tiny habit: when you put groceries away, take two minutes to straighten the shelves. Put the newest items behind the older ones so you use things before they expire.
Every three months, do a quick sweep for expired food or items you no longer need. This five minute check keeps your cupboard from becoming a mess again. I also keep a small empty bin on a shelf for items that need to be moved to another cupboard. That way I do not just shove things back in random spots.
Small kitchens require small maintenance. That is the trade off for having everything within arm’s reach. The effort is worth it when you open the door and see a calm, orderly space that makes cooking faster and less stressful.
If you have been putting off your own cupboard makeover, start with just one shelf today. Clear it off, wipe it down, and put back only what truly belongs there. That small win will motivate you to tackle the next shelf tomorrow. Your tiny kitchen can feel as organized as any walk in pantry. It just takes a few intentional steps and the right containers. Save this guide for your next organizing day and enjoy the satisfying after.
#kitchenorganization #cupboardorganization #smallkitchen #kitchenstorage #homeorganization
This post was researched and drafted with AI assistance, then personally reviewed and edited by Mia before publishing.
Leave a Comment