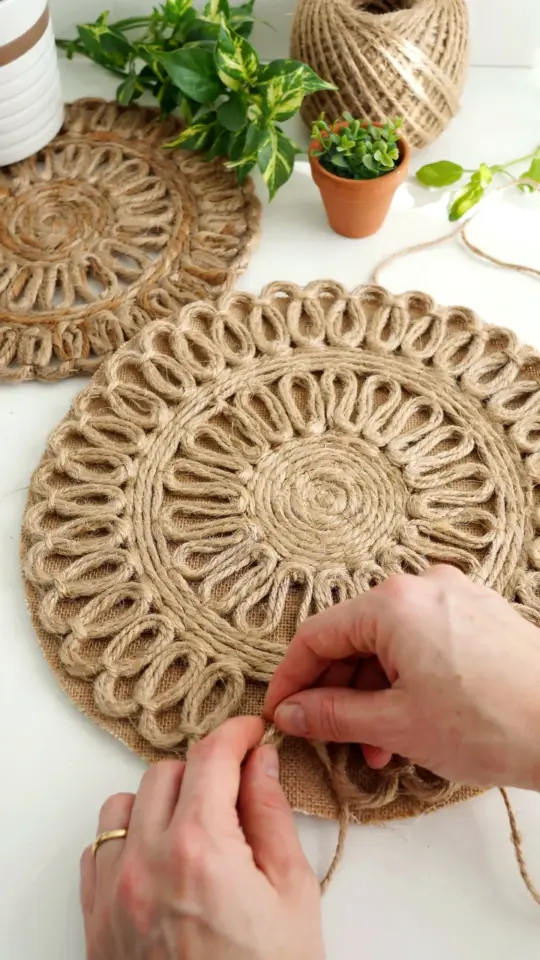
You want a kitchen that feels warm and lived in, but your walls are still bare and your wallet is tired. I get it, honestly. Ok so the solution might be sitting right in your dining drawer. I grabbed a set of woven placemats from a thrift store for two bucks, stapled a wire hanger to the back, and suddenly I had a piece of DIY wall decor that looks way more expensive than it is. Look, you can use these as placemats or hang them up. That dual purpose is what makes this project such a smart little win for kitchen decor. No power tools, no painting, no stress.
Why Placemats Make Great Budget Wall Art for Your Kitchen
Here’s the thing about placemats: they come in patterns you’d actually pay real money for as wall prints. Think rustic stripes, woven geometrics, cute fruit motifs. And they’re already finished on the edges. No cutting, no framing headaches. Not gonna lie, I’ve spent more on a single greeting card than I did on the three placemats I hung near my stove. That feels good.
But there’s a deeper reason this works for kitchen decor specifically. Kitchens are busy. Grease, steam, the occasional tomato sauce splash. A piece of fabric that you can gently wipe down or even toss in the wash? That’s practical art. Plus, when guests ask where you got that cool textile piece, you can say “Ikea, from the tableware aisle” with a completely straight face. Or estate sale. Whatever story you want.
What to Look for When Shopping for Placemat Supplies
I’m picky about which placemats become wall art. You don’t want flimsy paper things that crease and curl. Look for placemats with structure. Woven bamboo or seagrass is fantastic. They have weight. They don’t sag. Fabric placemats with a heavy cotton or linen feel also work, as long as they’re not too floppy.
Avoid placemats with thick plastic backing unless you plan to frame them. The plastic crinkles in weird ways and doesn’t hang flat. And check the size. Most placemats are around 12×18 inches. That’s a perfect size for a small wall gap, say between a window trim and a cabinet. But you can also buy larger rectangular ones for more impact. Here’s a quick checklist I use:
- Thickness: can you bend it without it snapping? Too stiff is bad.
- Pattern: something that won’t clash with your kitchen colors. I have a soft spot for indigo-dyed ones.
- Edges: a finished hem or bound edge saves you from fraying headaches later.
- Price: don’t spend more than $5 each. It defeats the budget purpose. Hit up dollar stores, thrift shops, or clearance aisles.
One weird personal rule I have? I smell them. Seriously. Some cheap bamboo placemats have a glue odor that takes weeks to fade. I learned that the hard way. My first set smelled like a hamster cage for a month. Not my finest kitchen decor moment.
Three Ways to Hang Placemats Without Damaging Your Walls
You’ve got options, and none of them require a drill. That’s part of the beauty of this project. First up is the classic binder clip method. Take a small binder clip, attach it to the top edge of the placemat, then hook it on a nail or command strip. The clip itself becomes part of the look. I use black clips on natural fiber placemats and it gives an intentional, almost industrial vibe. Pretty cute.
Second method is a wooden dowel. Sew or glue a small pocket at the top of the placemat (just fold over the edge and stitch, or use fabric tape), slide a dowel through, then hang the dowel with a string. This works best for fabric placemats. It gives a scroll-like feel. And it lets you swap out different placemats whenever you get bored. I change mine with the seasons. Fall gets orange linen, winter gets plaid.
Third, and this is my laziest favorite, just use washi tape. If your placemat is lightweight paper or thin cotton, washi tape directly on the wall won’t damage paint. Tape the top corners, press firmly, done. It’s not permanent and it’s cheap. But if you live in a humid kitchen, that tape will curl after a few weeks. So this is more of a temporary display trick, like for a dinner party or a craft day photo op.
Arranging a Placemat Gallery Wall That Doesn’t Look Like an Accident
One placemat alone is fine. But three or four together? That starts looking like real art. Arrangement matters though. You can’t just slap them up randomly. I know that from experience, I tried and ended up with a sad diagonal that made me feel like my walls were melting.
Start with a center anchor piece. Pick your favorite or largest placemat. Hang it at eye level. Then cluster smaller ones around it, leaving about two inches of space between each. Mixing textures helps a lot. A rough woven seagrass next to a smooth cotton placemat creates visual interest. And don’t match all the colors exactly. Let one placemat be slightly off. A different shade of blue. A tiny pattern contrast. That imperfection is what makes a gallery wall look curated instead of store-bought.
For a kitchen, hang them near the coffee station, above a small console table, or along a narrow wall between cabinets. And if you have an odd empty spot by the fridge, that’s prime real estate too. Just make sure the placemats are far enough from the stove to avoid direct heat and splatter. Not gonna lie, I singed the corner of one once. It just added character, I tell myself.
Actually, You Can Frame Them Too (And It’s Surprisingly Cheap)
Let’s say you want a cleaner look. No exposed edges, no clips, no dowels. Frames work great, especially for placemats that are vibrant or have a clear focal pattern. The trick is finding frames that are deep enough for thicker woven placemats. Standard IKEA frames usually work for thin fabric ones. For bamboo or seagrass, you might need a box frame or a shadow box.
But here’s a money-saving hack: skip custom framing. Buy a cheap poster frame from a dollar store, remove the poster backing and glass, then mount the placemat directly onto a piece of foam board cut to size. No matting needed. The placemat itself is the art. I’ve done this for three kitchen pieces and each cost under eight dollars total. One of them is a vintage floral placemat I found at a flea market with a weird stain in the corner. I positioned the stain behind a cabinet door handle on the wall. Problem solved. Thrillingly petty, I know.
Framing also works if your walls are textured or plaster. Command strips don’t always stick well to bumpy walls, but a frame gives you a solid backing to hang with a regular nail. My kitchen has old plaster that crumbles if you sneeze near it, so frames have saved me from putting thirty holes in the wall.
Beyond the Kitchen Wall: Other Spots for Placemat Art
You might think this is strictly for kitchens, but honestly, don’t limit yourself. I hung a seagrass placemat above my desk in the hallway. It breaks up the blank white paint and adds warmth. And you know what else? I’ve seen people use them as a headboard accent. Just tape or pin a line of matching placemats horizontally behind a bed. It’s like a soft, removable headboard for twenty bucks. I haven’t tried that myself, but it’s on my to-do list for the guest room.
Another idea for kitchen decor specifically: hang a placemat low, near a counter, and use it as a mini bulletin board. Slip little recipe cards or photos under the edges. The weave of a bamboo placemat holds paper pretty well without pins. That’s multifunctional and it only took you thirty seconds to set up. Anyway, if you have a closet door or a hallway nook that feels dead, a placemat is a low-commitment fix. It’s renter friendly, it’s cheap, and it’s reversible. You can’t say that about a giant mirror you have to screw into studs.
My Exact Step by Step for a Quick Saturday Project
Ok let’s get practical. You’ve got an hour, maybe two. Here’s exactly what I do. First, gather your placemats. I usually buy three at a time so I have options. Second, decide on a hanging method. For a no-sew approach, use binder clips or fabric tape to create a pocket. For a framed look, get your shadow box ready. Third, arrange them on the floor in front of your wall space. Adjust until it feels balanced. Do not rush this step. I once hung everything and realized the top one was slightly crooked compared to the bottom. Had to redo three nails.
Fourth, hang them. Use a level, because you will think it’s straight and it won’t be. Trust me. Fifth, step back and adjust. If something looks off, move it half an inch left or right. Sometimes a placemat just needs a tiny tilt to align with a window frame. Sixth, enjoy. That’s it. Now you have art that you can also use for dinner, which is a weird but wonderful feeling. I’ve actually pressed my face against a hangup placemat looking for a loose thread, realized it was fine, and then used it for place settings later that night. Versatility at its finest.
And if you mess up? Take it down, no harm done. The holes from a small nail are easily filled with a bit of spackle. Or just let them be. Tiny holes in your rental wall are way less stressful than trying to install shelving. At least that’s my opinion.
So go check your kitchen drawers, hit a thrift store this weekend, or dig through your leftover party supplies. Grab a few placemats and turn them into something that feels personal. Your walls don’t need more mass-produced prints. They need a little handmade warmth and a story. And if you get compliments, you can smirk and say, “It was a placemat.” That’s the best part.
If you try this DIY wall decor idea, save this post for later or pin it to remind yourself how easy it really is. I’d love to hear what placemats you use or if you found a weird vintage one with an old coffee ring. Those are my favorite. Happy crafting!
#diy #wall decor #placemat #kitchen decor #craft ideas
This post was researched and drafted with AI assistance, then personally reviewed and edited by Mia before publishing.
Leave a Comment