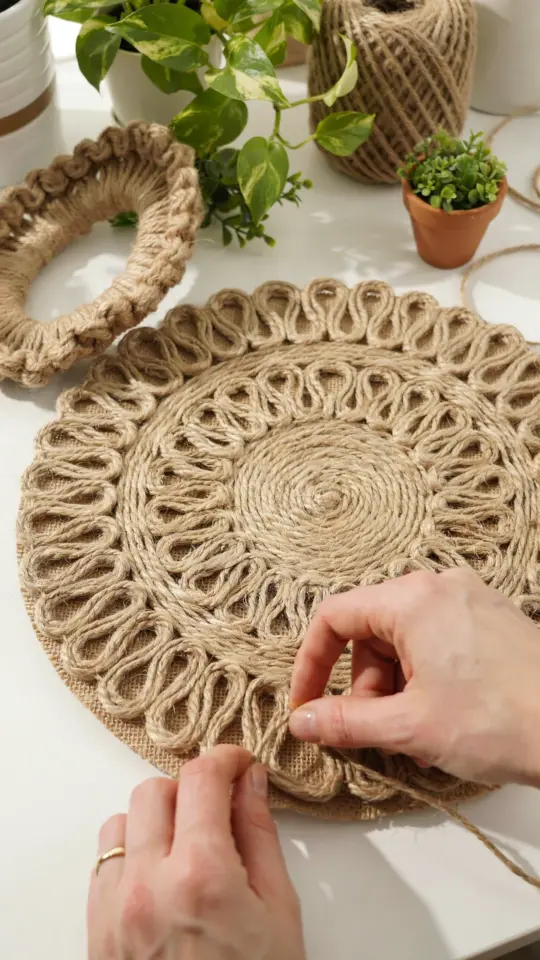
If you have ever wanted to add a handmade touch to your kitchen without spending much money, this DIY kitchen placemat and wall decor idea is exactly what you need. I came across this concept while trying to use up scraps of fabric and some old wooden frames. The beauty of it is that one simple piece can sit on your table for meals and then hang on the wall when you want to change the mood. It is a budget friendly craft that does not require any special skills, just a little patience and a willingness to try something new.
What You Will Need for This Budget Friendly Craft
Before you start, gather a few basic items. Most of these you probably already have at home, which keeps this project truly affordable. I like to use materials that would otherwise go to waste, like leftover fabric or worn out placemats. Here is a short list to get you started:
- A sturdy base such as an old placemat, a piece of thick cardboard, or a canvas panel
- Fabric remnants or a cotton tea towel (something washable if you plan to use it on a table)
- Mod Podge or a simple mixture of white glue and water
- Acrylic paint in two or three complementary colors
- A paintbrush and a small sponge
- Scissors or a craft knife
- Hanging hardware like a sawtooth hanger or a ribbon loop
That is really all you need. No power tools, no expensive supplies. This project is all about repurposing what you already own, which makes it a great example of upcycled home decor that feels personal and unique.
Step 1: Choosing the Right Base
The base is the foundation, so pick something that is flat and moderately sturdy. An old woven placemat works perfectly because it already has the right size and shape. If you do not have one, a piece of corrugated cardboard cut to 12 by 18 inches will do the same job. I once used a cheap canvas panel from a dollar store, and it turned out great.
Make sure the surface is clean and dry. If you are using cardboard, you might want to paint a thin layer of gesso or white acrylic on top to prevent the paper fibers from showing through. This step is optional, but it gives a smoother finish for the fabric or paint later. For a true placematwallart hybrid, I recommend a base that is not too thick, so it can lie flat on a table yet still hang flush against a wall.
Step 2: Adding Color and Pattern
Now comes the creative part. You can either paint directly onto the base or glue fabric onto it. For a beginner friendly approach, I suggest using fabric because it is forgiving and adds texture. Cut your fabric a little larger than the base, then brush a thin layer of Mod Podge onto the base. Lay the fabric on top and smooth out all the bubbles with your fingers or a squeegee.
If you prefer painting, use a sponge to dab on two or three colors in a random pattern. This gives a lovely stucco like effect that hides any mistakes. Keep your palette simple, maybe a warm cream and a muted green. Too many colors can make the piece feel busy. I often add a thin border by painting the edges a darker shade. That small detail helps the finished item look intentional and polished, even for a handmadekitchenideas project done in one afternoon.
Step 3: Making It Work as Placemats
When you want this piece to function as a placemat, you need to protect it from spills and heat. If you used fabric, seal it with a waterproof sealant or a layer of clear acrylic spray. For painted surfaces, two coats of matte polyurethane work well. Let each coat dry completely before using the mat at the table.
Remember that no craft is truly heatproof, so always put a trivet under hot pots. But for everyday meals, a sealed placemat holds up nicely. I have been using mine for three months, and it still looks fresh. Just wipe it with a damp cloth after eating. This dual purpose aspect is what makes the project so appealing: you get both functional kitchen textiles and decorative wall art from one piece of work.
Step 4: Turning It Into Wall Art
To hang your creation, the easiest method is to attach a small sawtooth hanger to the back with strong glue or a staple. If your base is thin cardboard, glue a piece of ribbon in a loop shape on the back. Let the glue dry overnight to ensure it holds the weight. I prefer a sawtooth h
#diykitchendecor #placematwallart #budgetfriendlycraft #upcycledhomedecor #handmadekitchenideas
This post was researched and drafted with AI assistance, then personally reviewed and edited by Mia before publishing.
Leave a Comment